The doily has been a trademark in many Greek households, placed everywhere from on the dining table to adorning the top of the television set and even the fridge.
But as the first generation Greek Australians age and pass on, we are often left with these doilies in our procession, and the nostalgia for days passed.
To honour the older women in our lives and their craft, we have scoured the internet for ideas on how to re-purpose your lace doilies, to showcase a piece of your heritage in your home.
Believe it or not, doilies are trendy again!
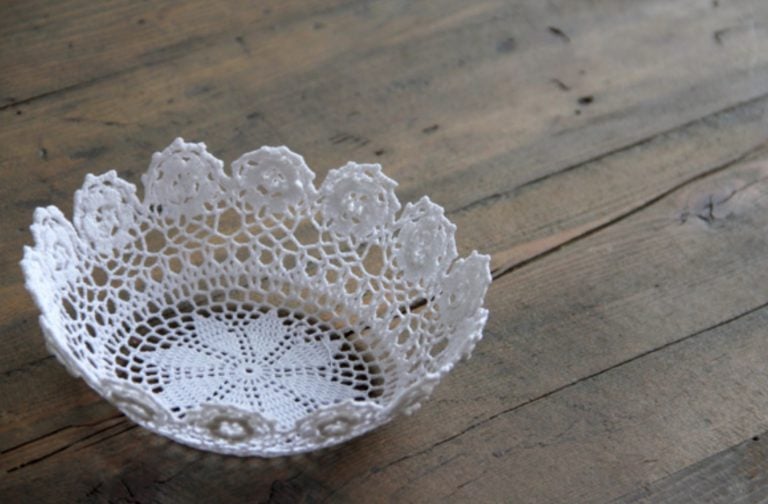
1. Lace Doily Bowl
What you need: doilies, fabric stiffener, a bowl.
What to do: Turn your bowl upside down, soak the doily in fabric stiffener, and drape the doily on the bottom of the bowl. Use your fingers to smooth the doily over the bowl, removing any wrinkles and pushing out excess fabric stiffener. Leave it on the bowl overnight to allow it to dry and harden. In the morning, your lace bowls will be ready for use!
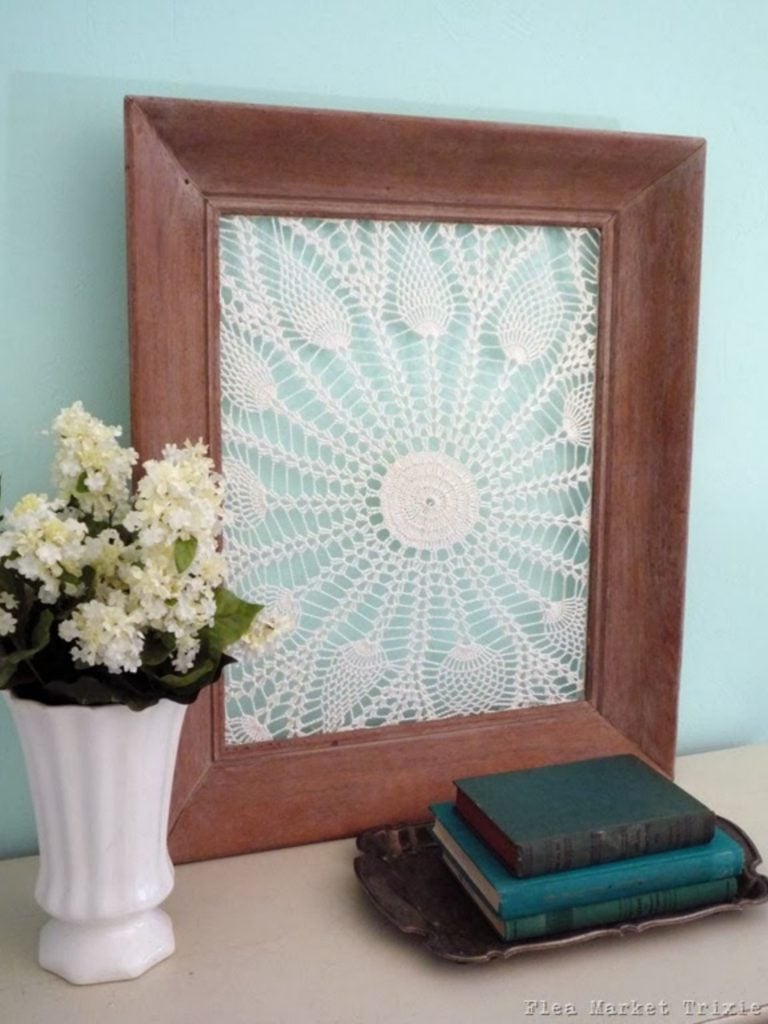
2. Framed Doilies
What you need: Wood frames (we like the vintage look if possible), doilies, stapler/glue, scissors.
What to do: Staple and stretch the lace over the backside of the frame, making sure you stretch it rather taught. When you’re done stapling or gluing, trim the excess doily with scissors.
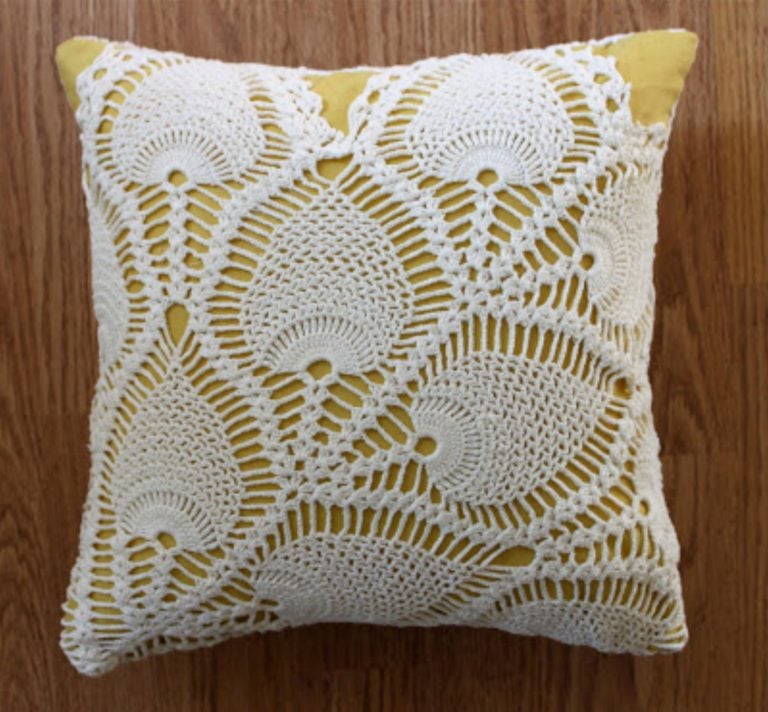
3. Doily Pillow Case
What you need: Doilies, two pieces of fabric 1/2″ larger on both sides than your pillow form, a needle, embroidery thread, sewing machine, scissors.
What to do: Arrange doilies onto the pillowcase, pin down onto fabric and sew directly with sewing machine. Make sure your doilies cover the top piece of fabric and pin down and trim off the excess doilies. Loosely stitch around the edges of your pillow to keep things in place. You can repeat this process on the back or find a large enough doily to cover most of it, or just stitch a single doily onto the fabric so that it looks nice. Pin your front and back sides together with right sides facing each other. Starting a little in from the bottom right corner, stitch along the edge until you’re a little in from the bottom left corner. Carefully insert your pillow form and hand-stitch the bottom shut.
READ MORE: The legendary doily: a trademark in every Greek Australian household
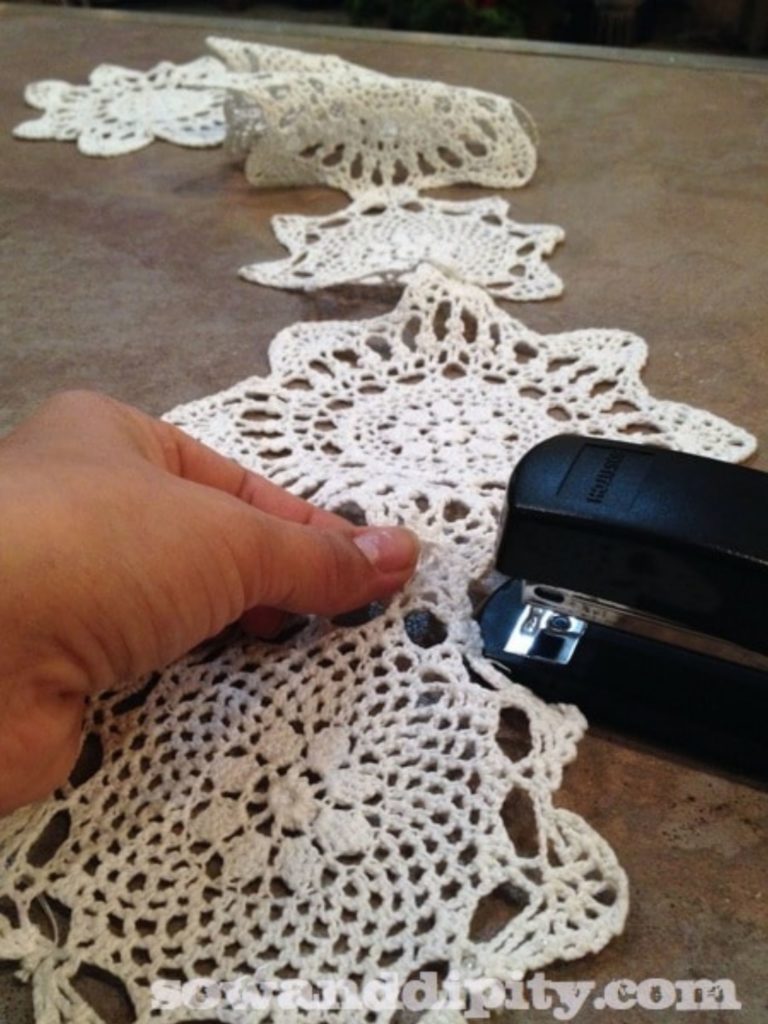
4. Doily Table Runner
What you need: Doilies, string.
What to do: Lay out your largest doilies first. Fill in with smaller doilies. Overlap the edges of the big and small doilies so that the small ones aren’t always on top. Tack the doilies together using string on the underside.

5. Doily Christmas Tree Garland
What you need: Doilies, stapler.
What to do: Mini doilies work best, but it also depends on the size of your tree. Lay them out, and staple together to create a lace-like garland.
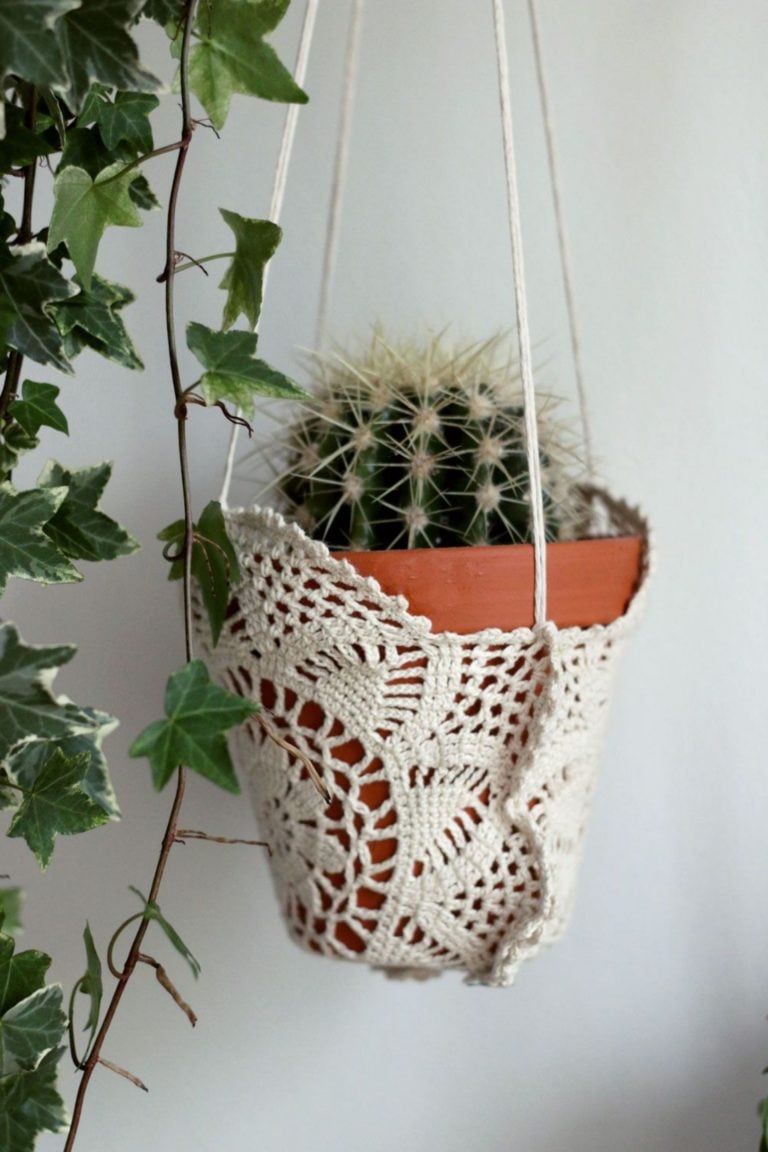
6. Doily Plant Hanger
What you need: 2 doilies, string, sewing machine.
What to do: Stitch your two doilies together on your sewing machine. Sew on some string as straps.
7. Doily Luminaries
What you need: Glass jars, adhesive spray, doilies, hessian (or lace, sheer ribbon, etc), twine, buttons, and/or ribbon.
What to do: Make sure your jars are clean and dry. Lay doily on table and spray one side with adhesive spray. Place the jar onto the doily and press in place. Spray the rim with adhesive, then wrap the jar rim with hessian or ribbon. Tie a piece of twine around the rim if desired. Another option is to use the canning jar lid, then wrap that with twine or loose threads from your hessian. Thread two of the ends through a button and tie in a knot.

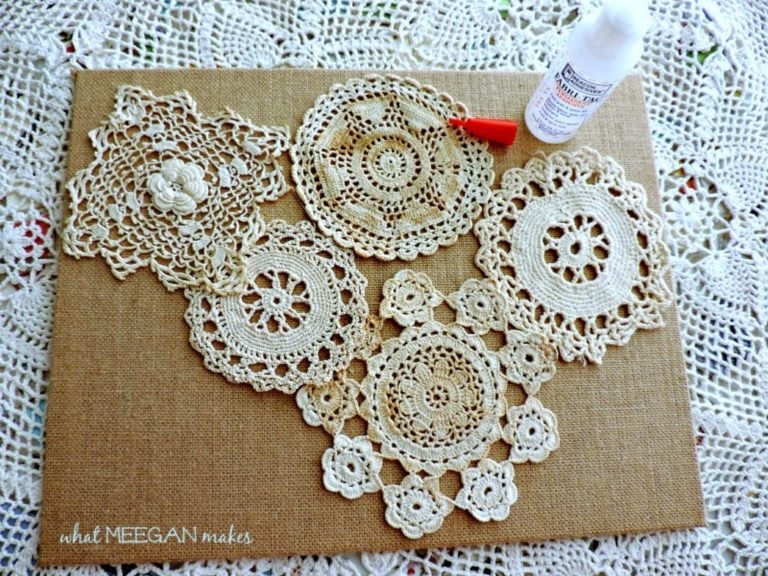
8. Doily Canvas
What you need: Doilies, hessian canvas, fabric glue.
What to do: Choose how you would like to arrange your doilies. Using fabric glue adhere the doilies in place (you don’t need much). Wait 24 hours to hang.
9. Doily Tablecloth
What you need: Doilies, tablecloth, cotton, pins, sewing machine.
What to do: A similar concept to the pillow case. Lay out your table cloth and arrange your doilies, pinning them directly onto the table cloth in the design you like best. You can either hand sew them on first, or go direct to your sewing machine and sew them on.

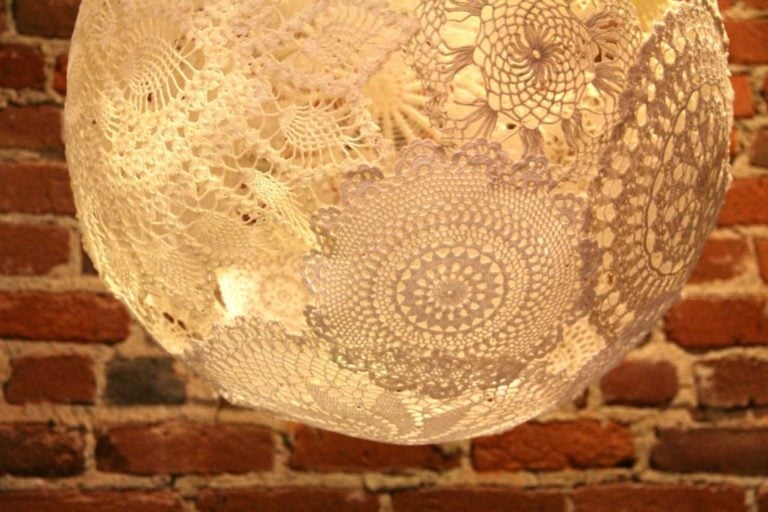
10. Doily Lampshade
What you need: Doilies, wallpaper glue, round balloon (sizing is optional, but you don’t want the lampshade to run too close to the bulb itself), large paint brush.
What to do: Blow up your balloon. Taking your first doily, place on some newspaper and brush liberally with glue. Place on top of your balloon, leaving a bit of room around the top, which is where your bulb will eventually slip through. Repeat with more doilies, and be sure to overlap along the edges, until the whole balloon is covered. Add another coat of glue on all the doilies on the balloon. Allow to dry for 1-2 days. Once everything’s all dry grab something sharp and pop the balloon. (Best to use cold energy-efficient bulb so as not to risk any burning or melting of the glue.) Attach a nice looking cord and lamp fitting.