Cooking and a love of food is something that has been instilled in restaurateur, Anastasia Coltman (nee Manousakis) by her yiayia and namesake Anastasia.
Having grown up living next door to her grandparents in Melbourne, over the year’s she developed a special bond with her grandmother centred around the kitchen table; if they weren’t cooking together, she was sitting at the table doing her homework, and by 12, had already started well and truly learning the craft of opening her own filo.
“As a child my ‘play dough’ was always homemade dough, and if we weren’t making our own play dough, we were moulding our own chocolate. We were always cooking or baking something!” Anastasia told Neos Kosmos.
Her experience surrounding food was truly a sensory one, with Greek music playing in the background, and beautiful aromas wafting through the house. In the summer, she would be found accompanying her yiayia in the outdoor kitchen built by her pappou, incorporating veggies grown in their backyard were possible.
“The staples of the meal were always the same and always home made,” she recalls.
“Tzatziki, grilled peppers immersed in olive oil and vinegar, a horiatiki salad, feta cheese and an alternating main meal,” which would be anything from roast lamb to yourvalakia, while on Sundays or special occasions yiayia would bake one of her famous tiropites.
Now as a mother herself, the 29-year-old finds herself continually drawn to yiayia‘s ‘ways’, and even has a designated Pita Day every quarter, during which she spends eight hours honing her skills, and making pites with an array of fillings, and then freezing them for convenience.
“As a modern day woman with a growing family and business, I find Pita Day to be a convenient way to ensure we can still enjoy the quality of home made pastry without it impacting my busy schedule,” Anastasia explains.
“I love the tradition and nostalgia behind these rituals and hope to one day pass my knowledge and passion for food down to my daughter and future grandchildren.”
RECIPE:
Diplofilo Pita
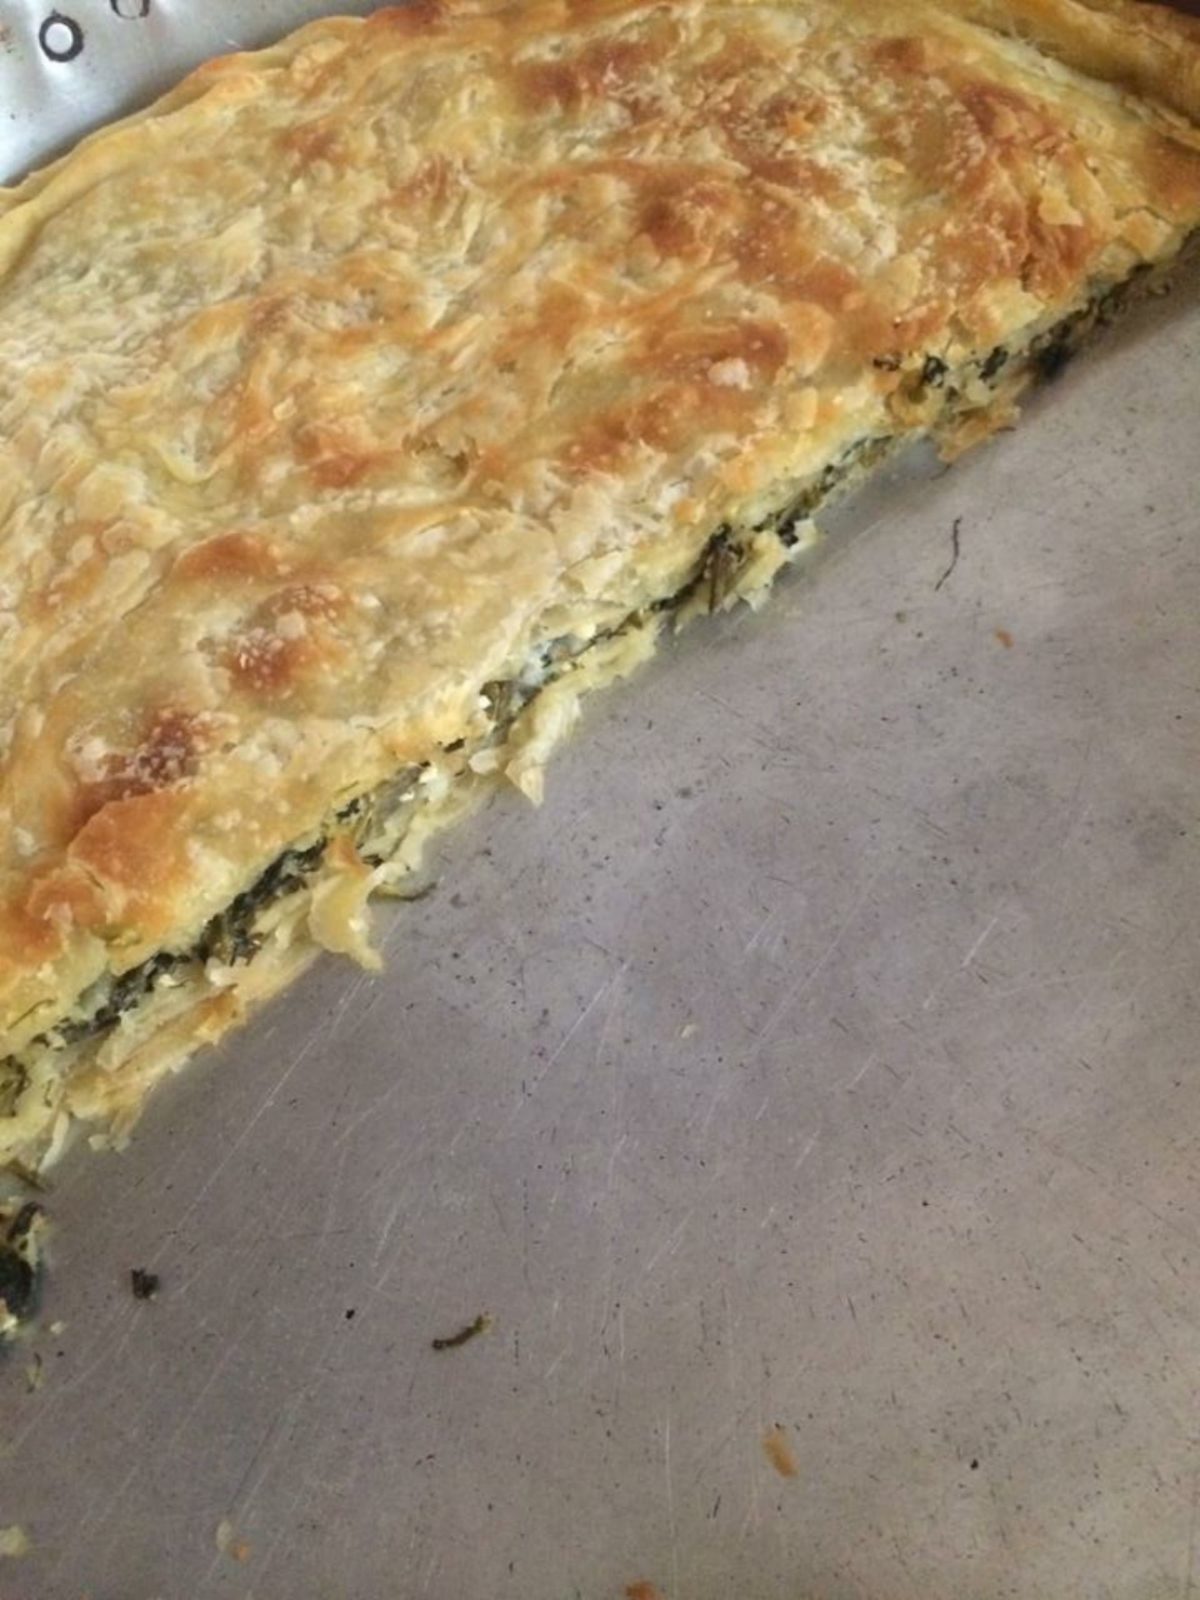
While Anastasia has adopted her yiayia‘s ‘me to mati‘ policy, rarely measuring out ingredients, she has made an exception, and generously shared the recipe for her favourite pita for you to try at home. Handed down from her yiayia, it has been slightly altered over time to become a delicious combination of tiropita, spanakopita, and prasopita in one. After all, even the best of recipes can be tweaked and improved over time.
“Ever wondered how to get those puff pastry layers from a homemade filo? It’s the salingari method as yiayia describes it! The key ingredients are a heap of butter, a lot of elbow grease and a willingness to get your hands dirty and doughy,” says Anastasia.
Enjoy!
Ingredients:
Dough
2 kg Special white fine plain flour
Salt
Water
Clarified/ melted unsalted butter to separate and coat the layers of filo and pita tray.
Filling
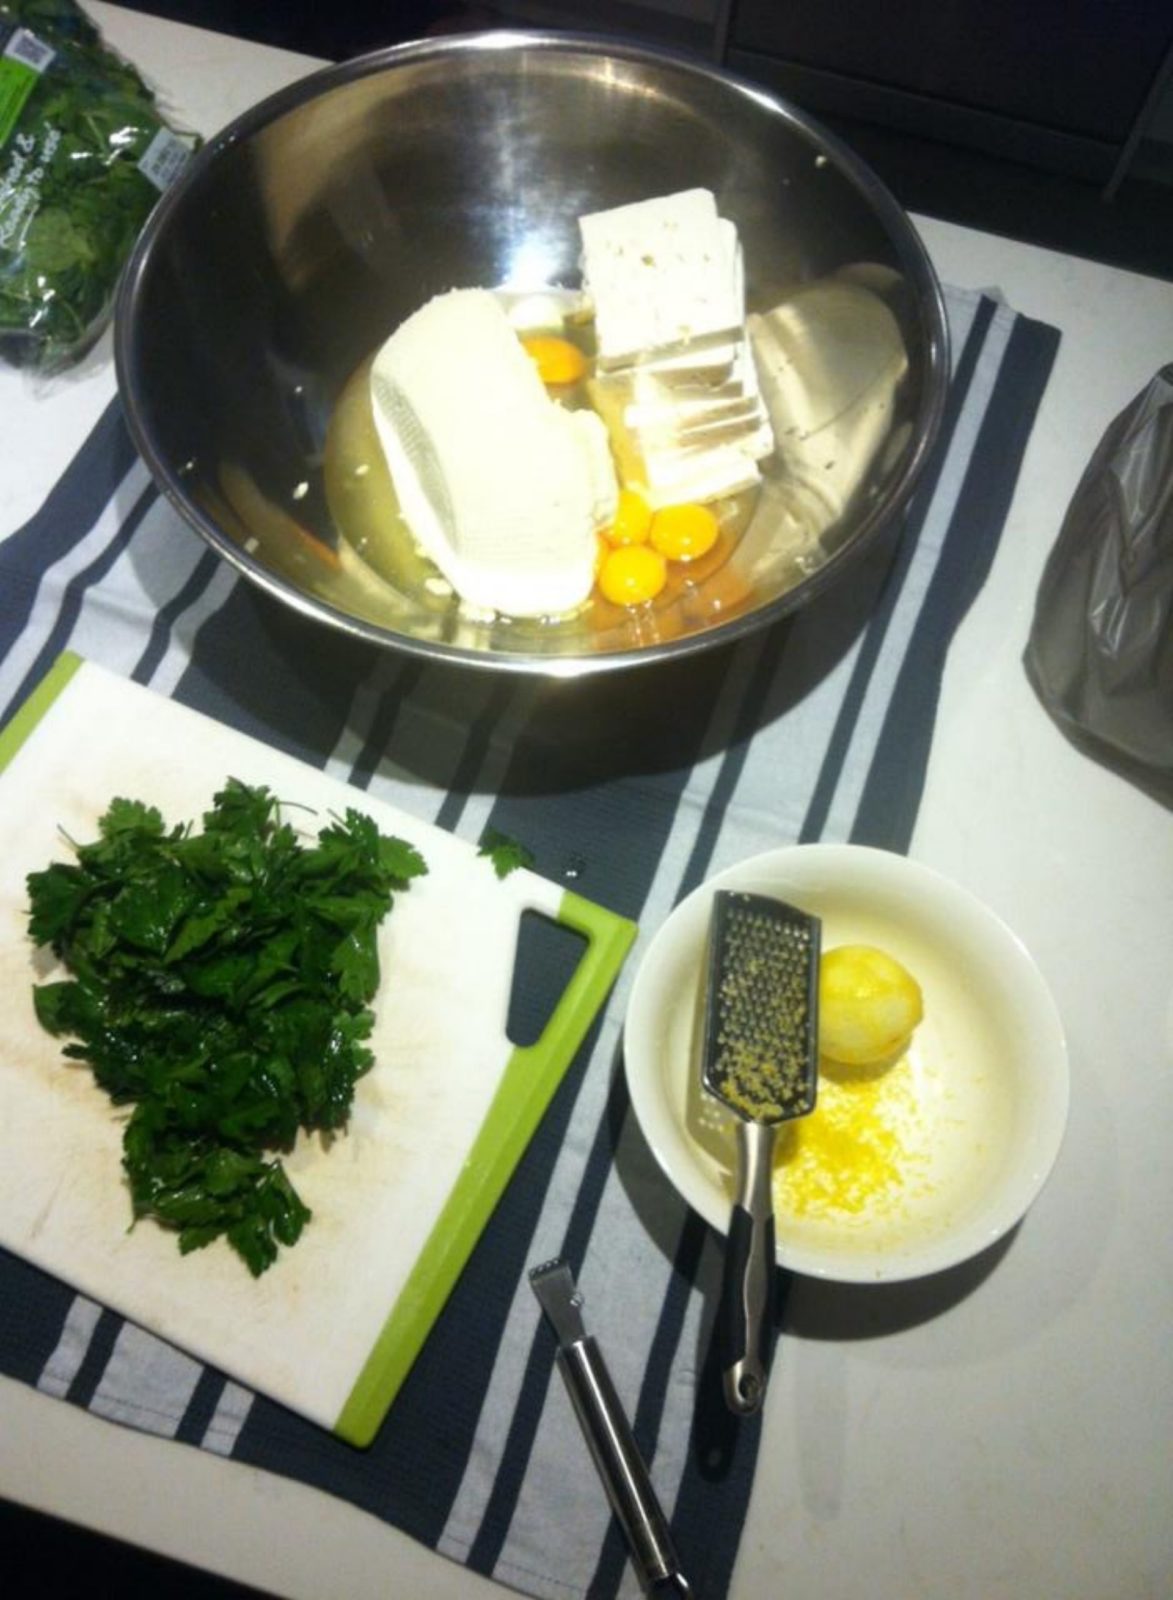
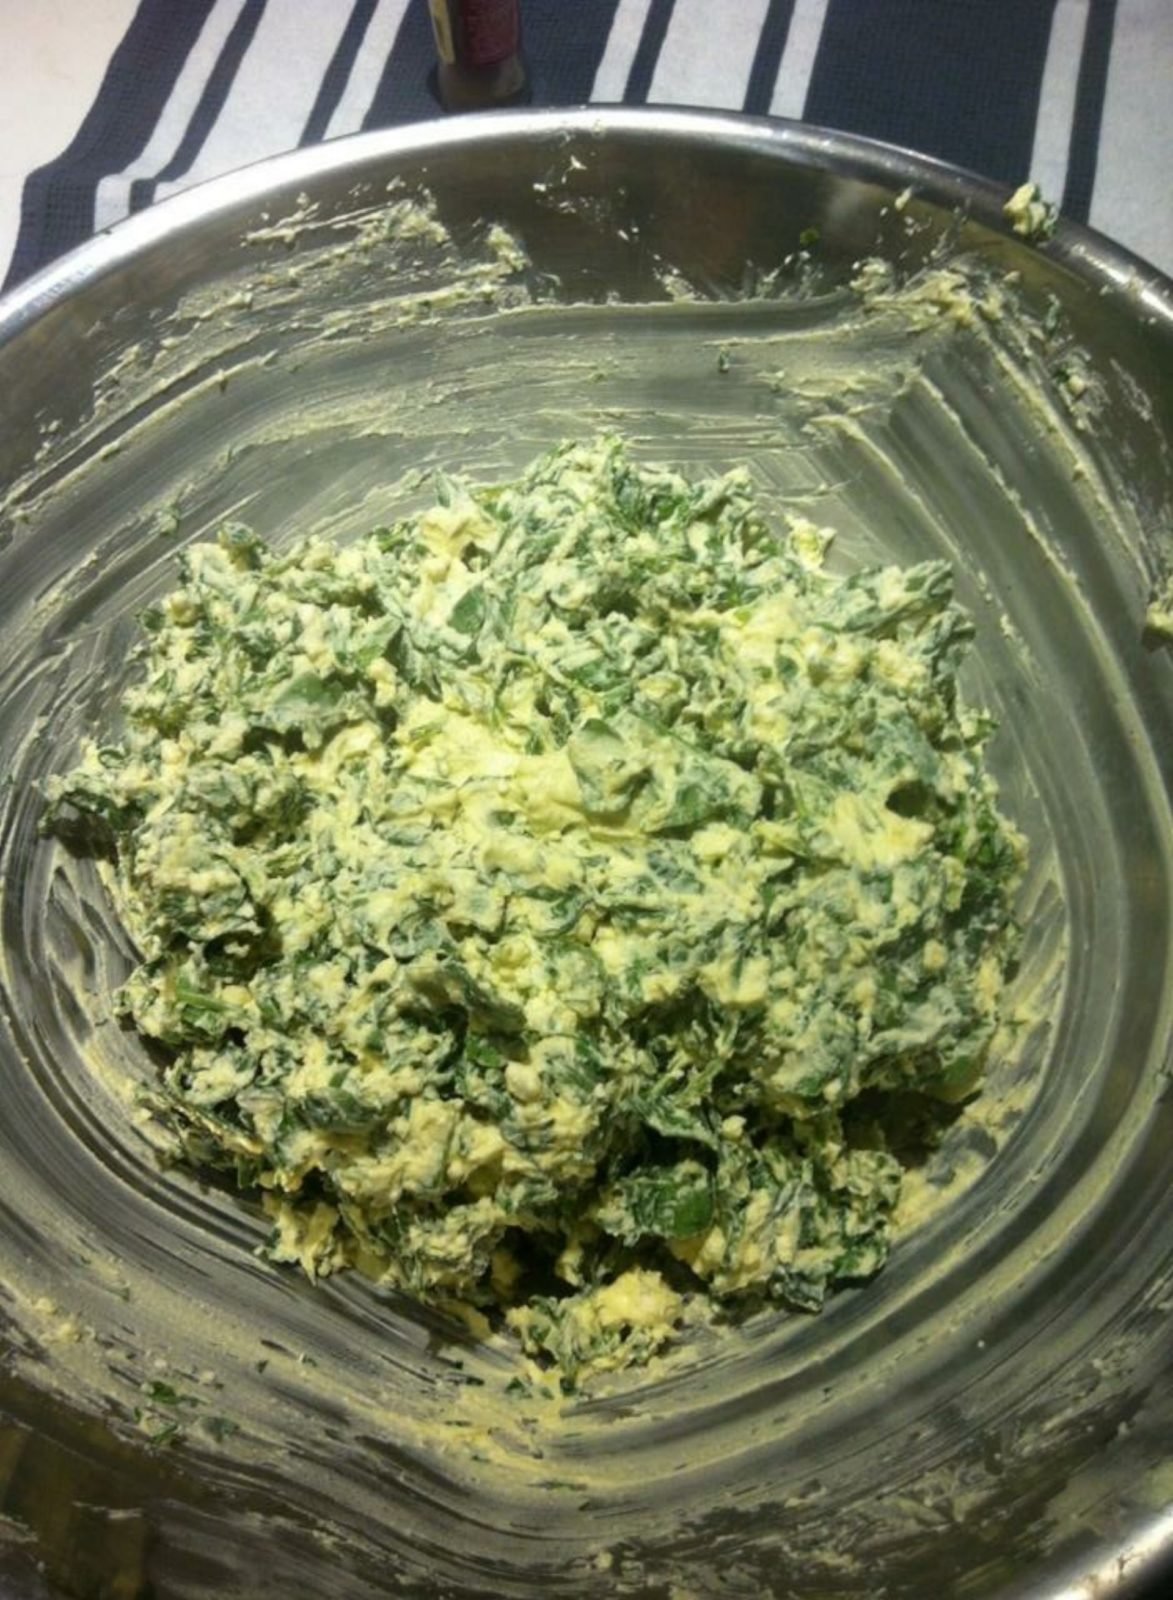
500g ricotta and 1kg feta, crumbled
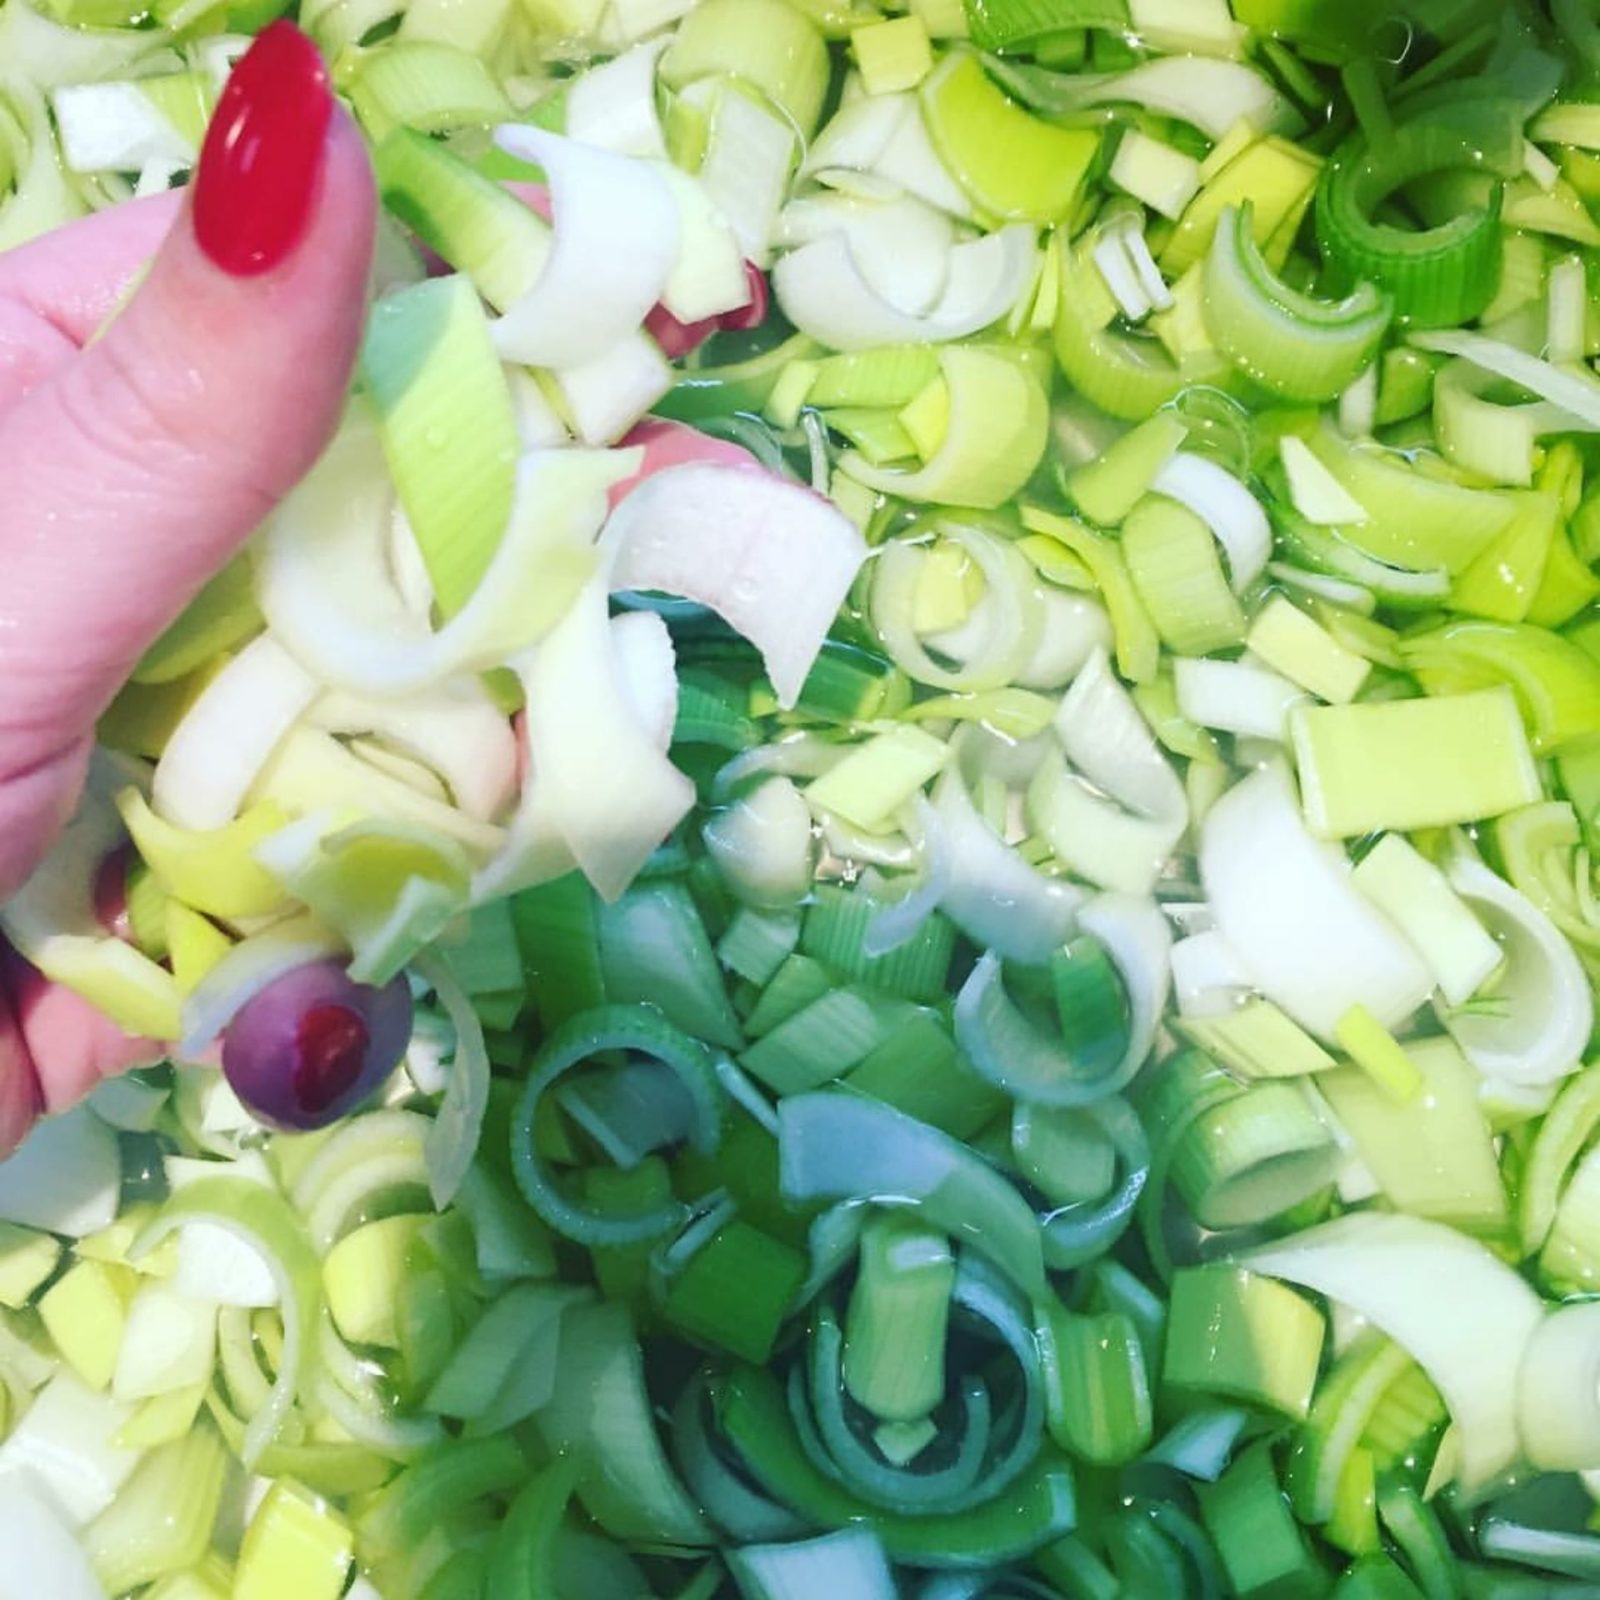
2 bunches of leek, chopped, washed (separate layers in warm water)
4-6 whole eggs
1 bunch spinach, washed and chopped
1/2 bunch dill, washed and chopped
1 bunch parsley, hand picked from stems, washed and chopped
¼ teaspoon nutmeg
½ teaspoon paprika
½ teaspoon black pepper
Rind of one lemon, finely grated
1 cup breadcrumbs (optional)
Note: You may find it easier and more bearable on the hands if your ingredients have been out of the fridge for an hour. Also during winter, ensure you adequately heat your prep area first.
Method:
Mixture
1. Fry off leek in a combination of butter and olive oil, cooking two thirds through to partially caramelise. Sauteing your spinach is optional but not necessary.
2. Combine all your filling ingredients in a large mixing bowl by hand, squelching and squeezing the mixture between your fingers. Try to avoid using a mixer or whisk; the greens will get stuck in your utensils and there’s something wonderful and old world in using your hands. Evaluate the texture of the mixture, breaking down any large chunks of feta and ensuring greens are well-coated in cheese and egg.
3. Taste your mixture, and season to taste if not salty enough.
Pastry
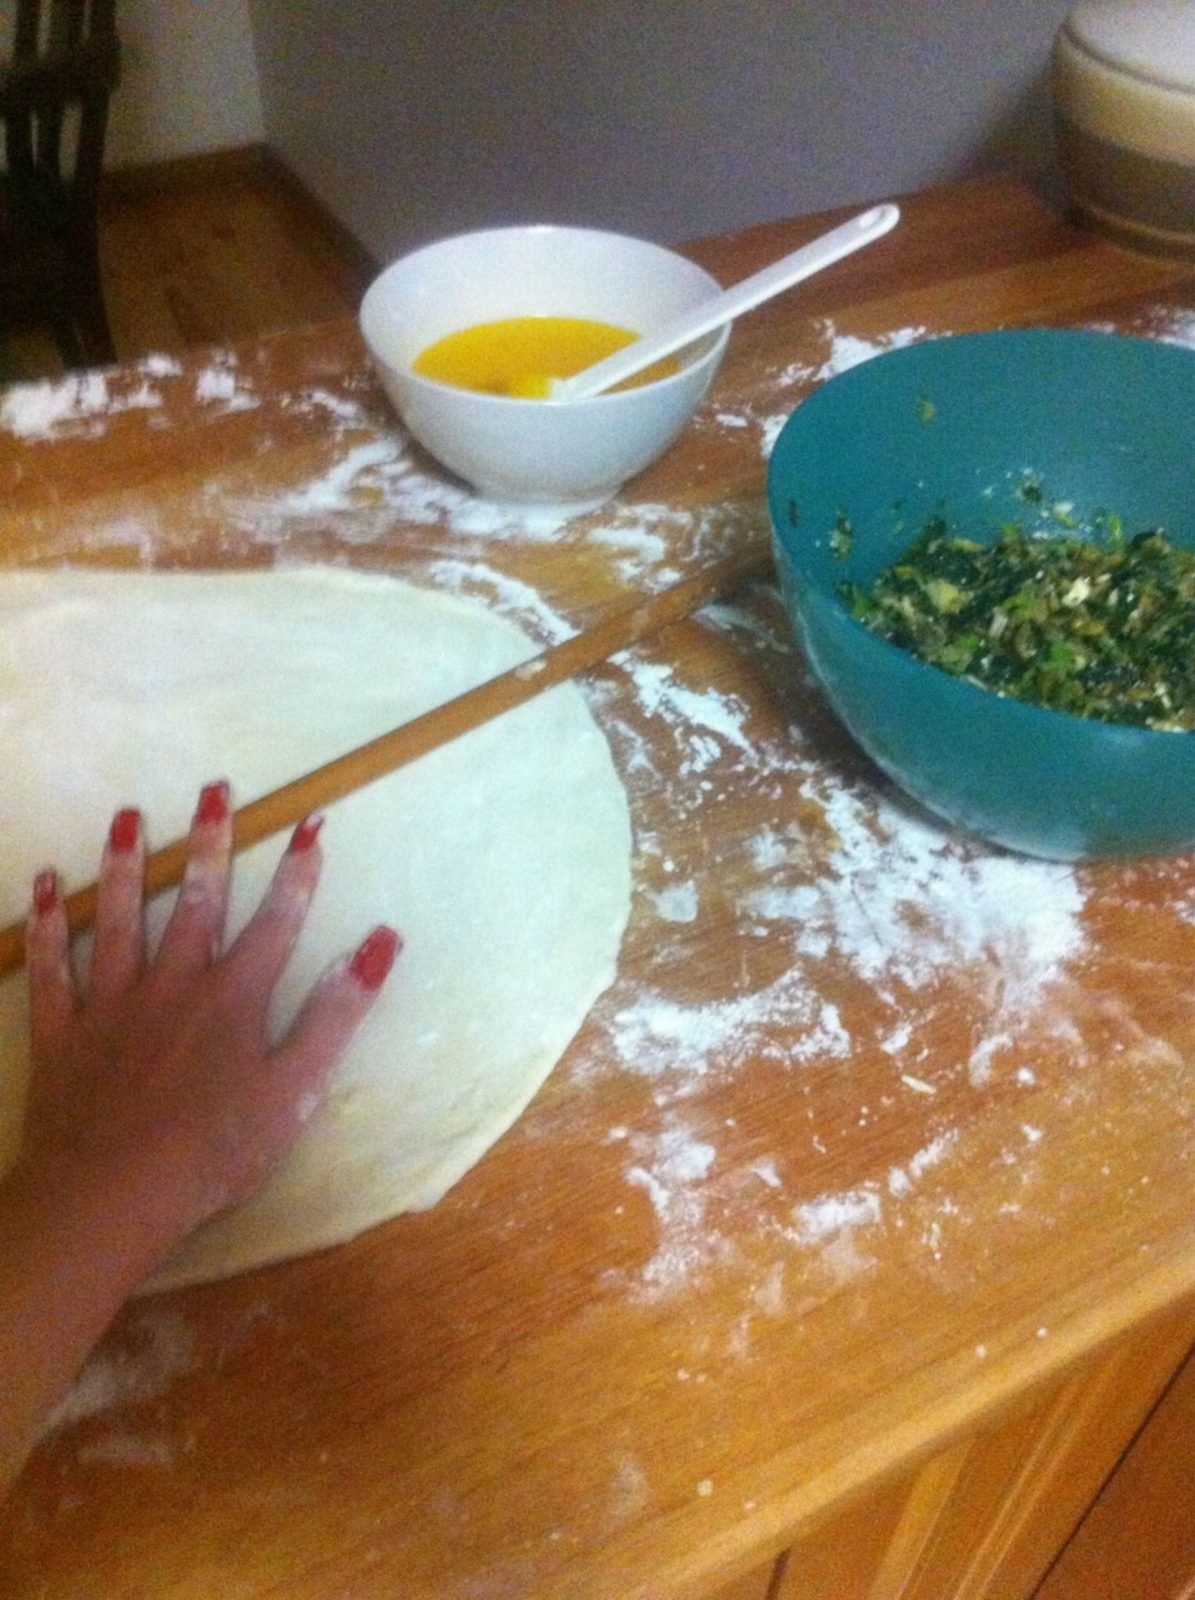
1. On low in the microwave or over a stove, melt your butter and set aside in a small bowl.
2. Scrub clean and dry your bench space, then dust with flour.
3. In a well method, or in a separate mixing bowl, combine 1 kg of flour with 1 teaspoon of salt and water to form a wet, sticky dough. Once formed, split this dough in two and either set aside in a bowl under a cloth to proof or proceed straight into working the dough into filo pastry.
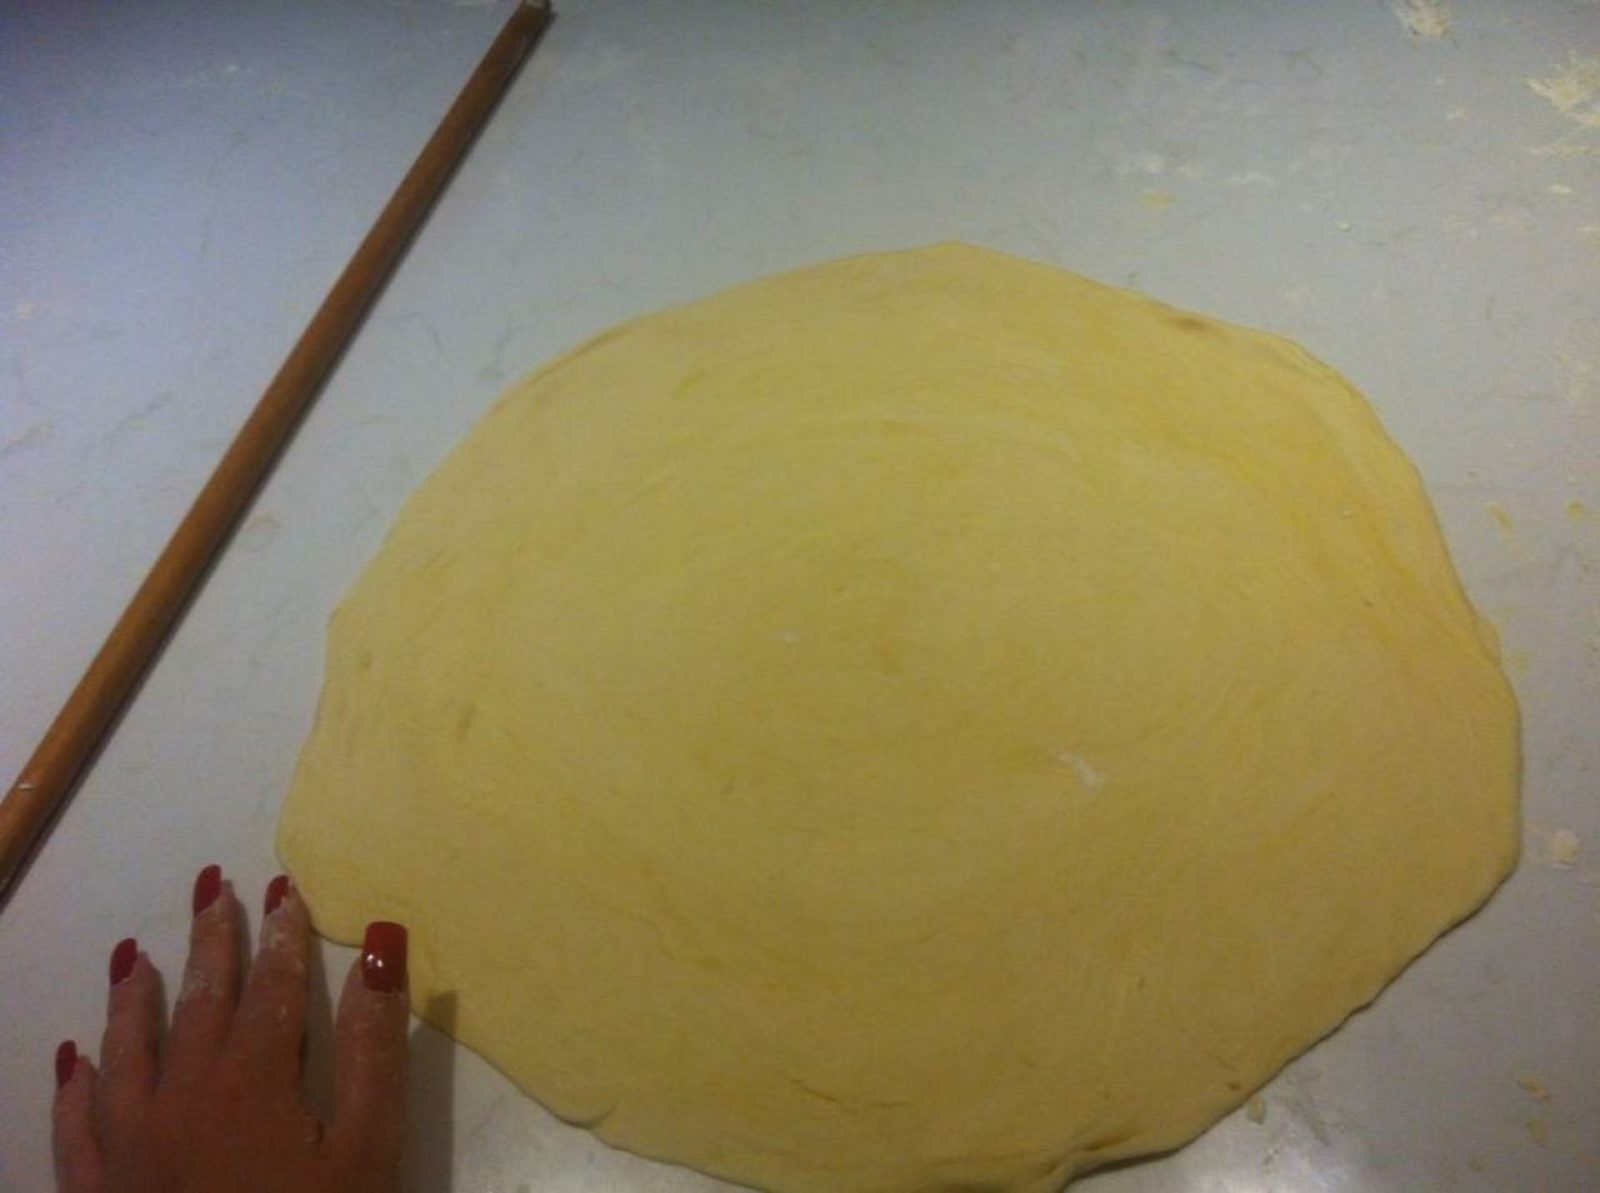
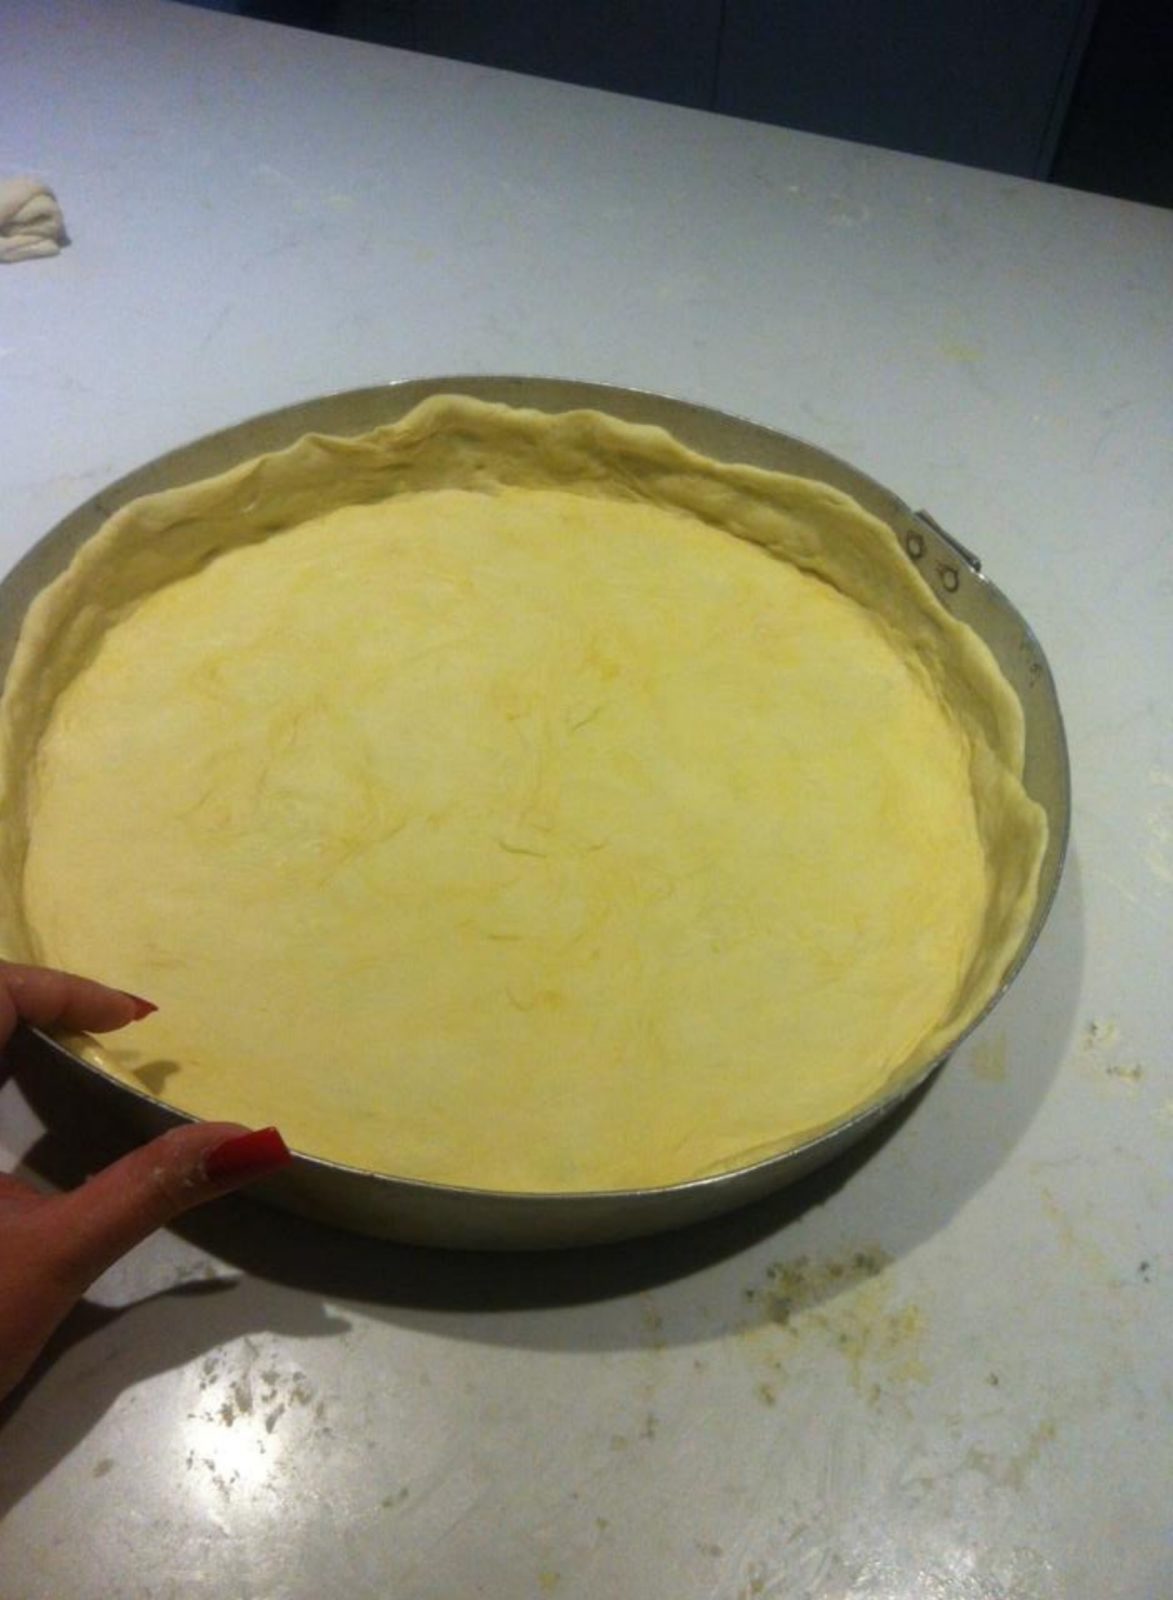
4. With each ball of dough add flour and begin to roll out and flip. Rolling, flipping and flouring as you see fit. The aim is to work your way around the bench, stretching and opening the dough as wide and thin as possible (aka the travihkti method). Once satisfied with your filo size and thickness (in between thick and thin) begin adding the butter.
5. Using the pastry brush generously paint the butter on or flick on into large drips and then swish around onto the surface of the filo with your hands.
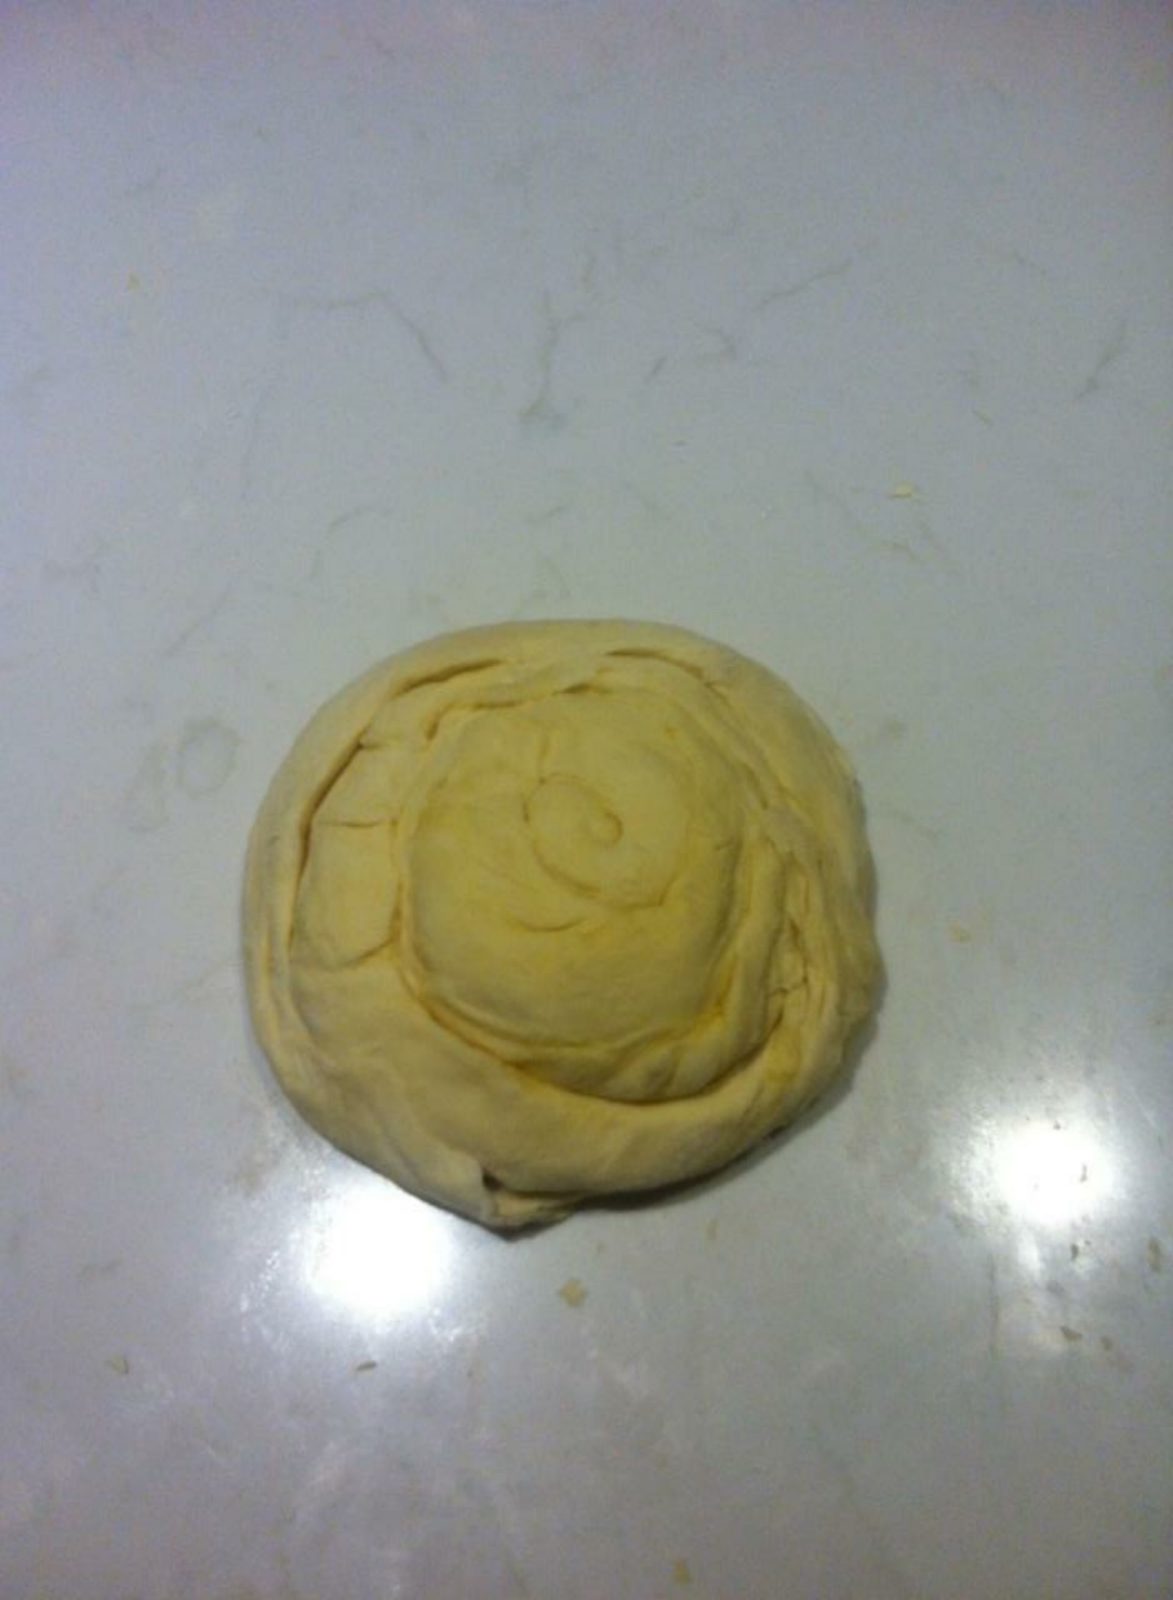
6. The trick now is to roll the big round sheet of filo from the outside into itself, until it forms into a long strip. Once a long strip of dough is formed you then want to roll it from one end, inside itself, like a snail or pinwheel, creating separated layers from the butter once it bakes. The pinwheel can be rolled out, thick, to act as a bottom layer of your tray.
7. Repeat this process with your second ball of dough for the top layer.
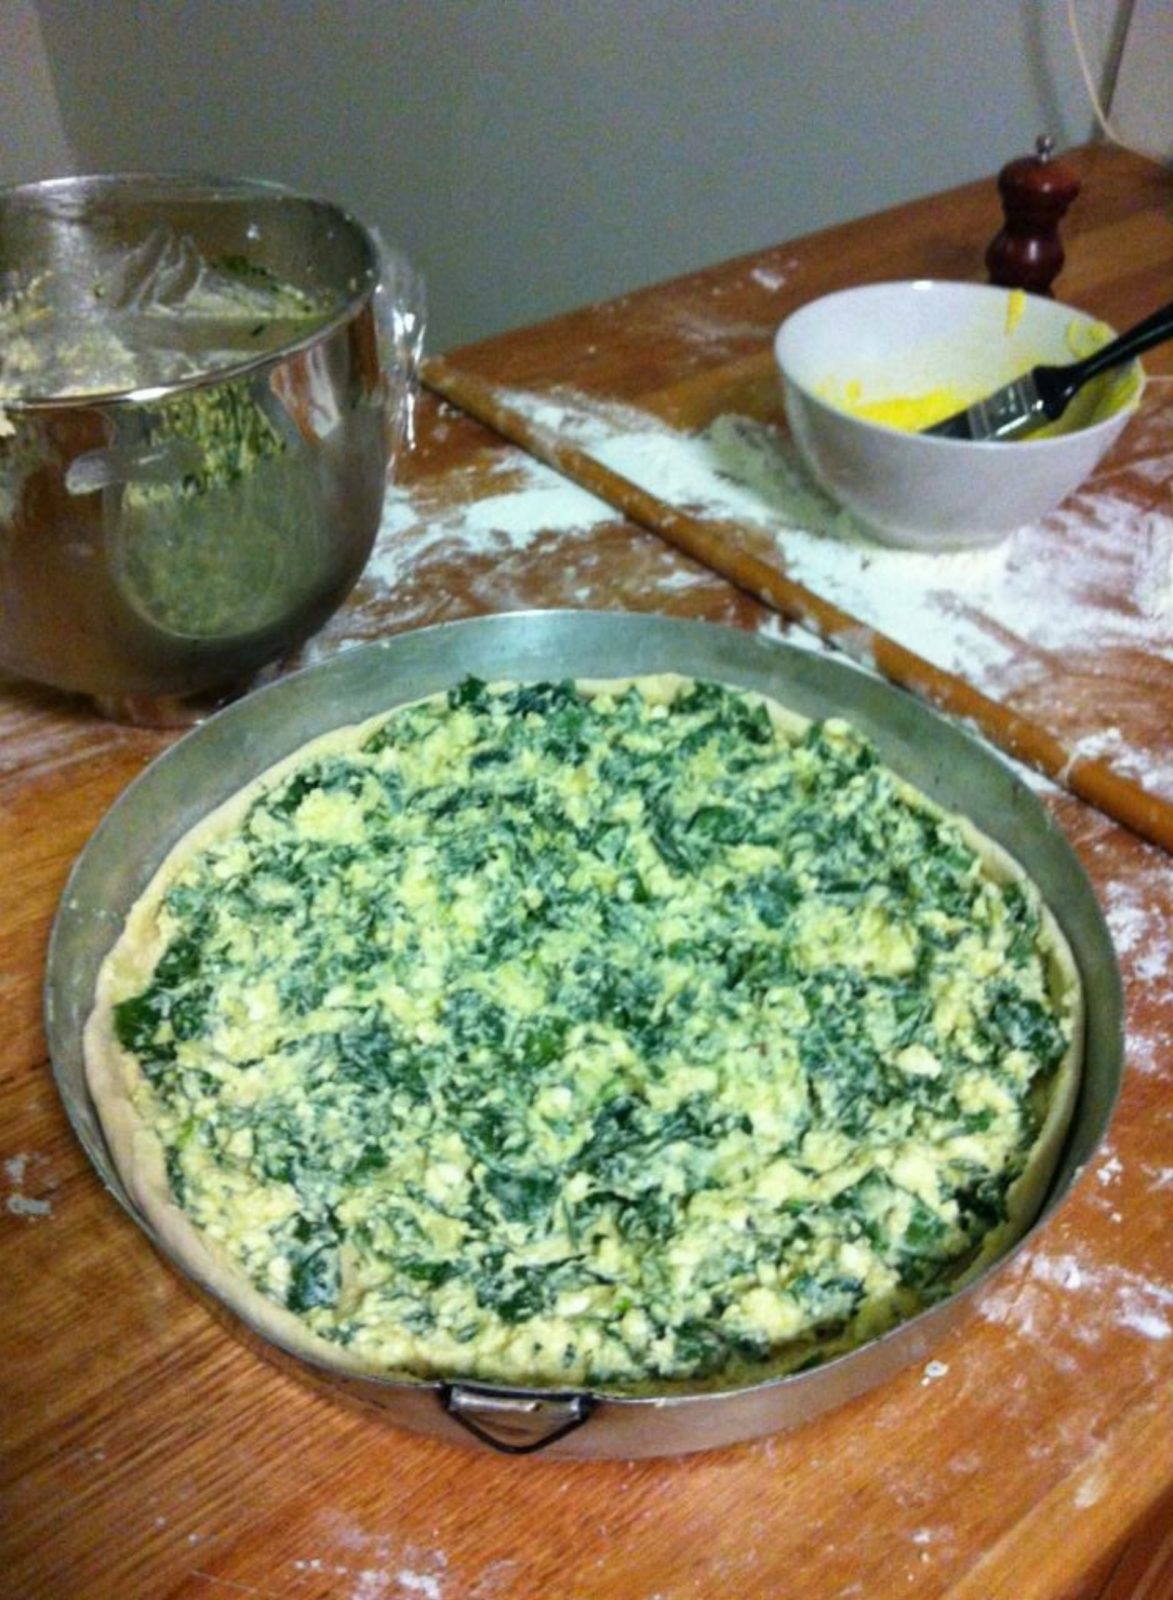
8. Generously coat your pita tray with butter and then begin to lay down your bottom layer of filo. The filo should overlap the sides of the tray like a piecrust.
Combine
1. Simply add your filling as thick or as thin as you desire. I tend to like a generous, thick filling, which is why I don’t make it salty and prefer the accompaniment of refreshing herbs.
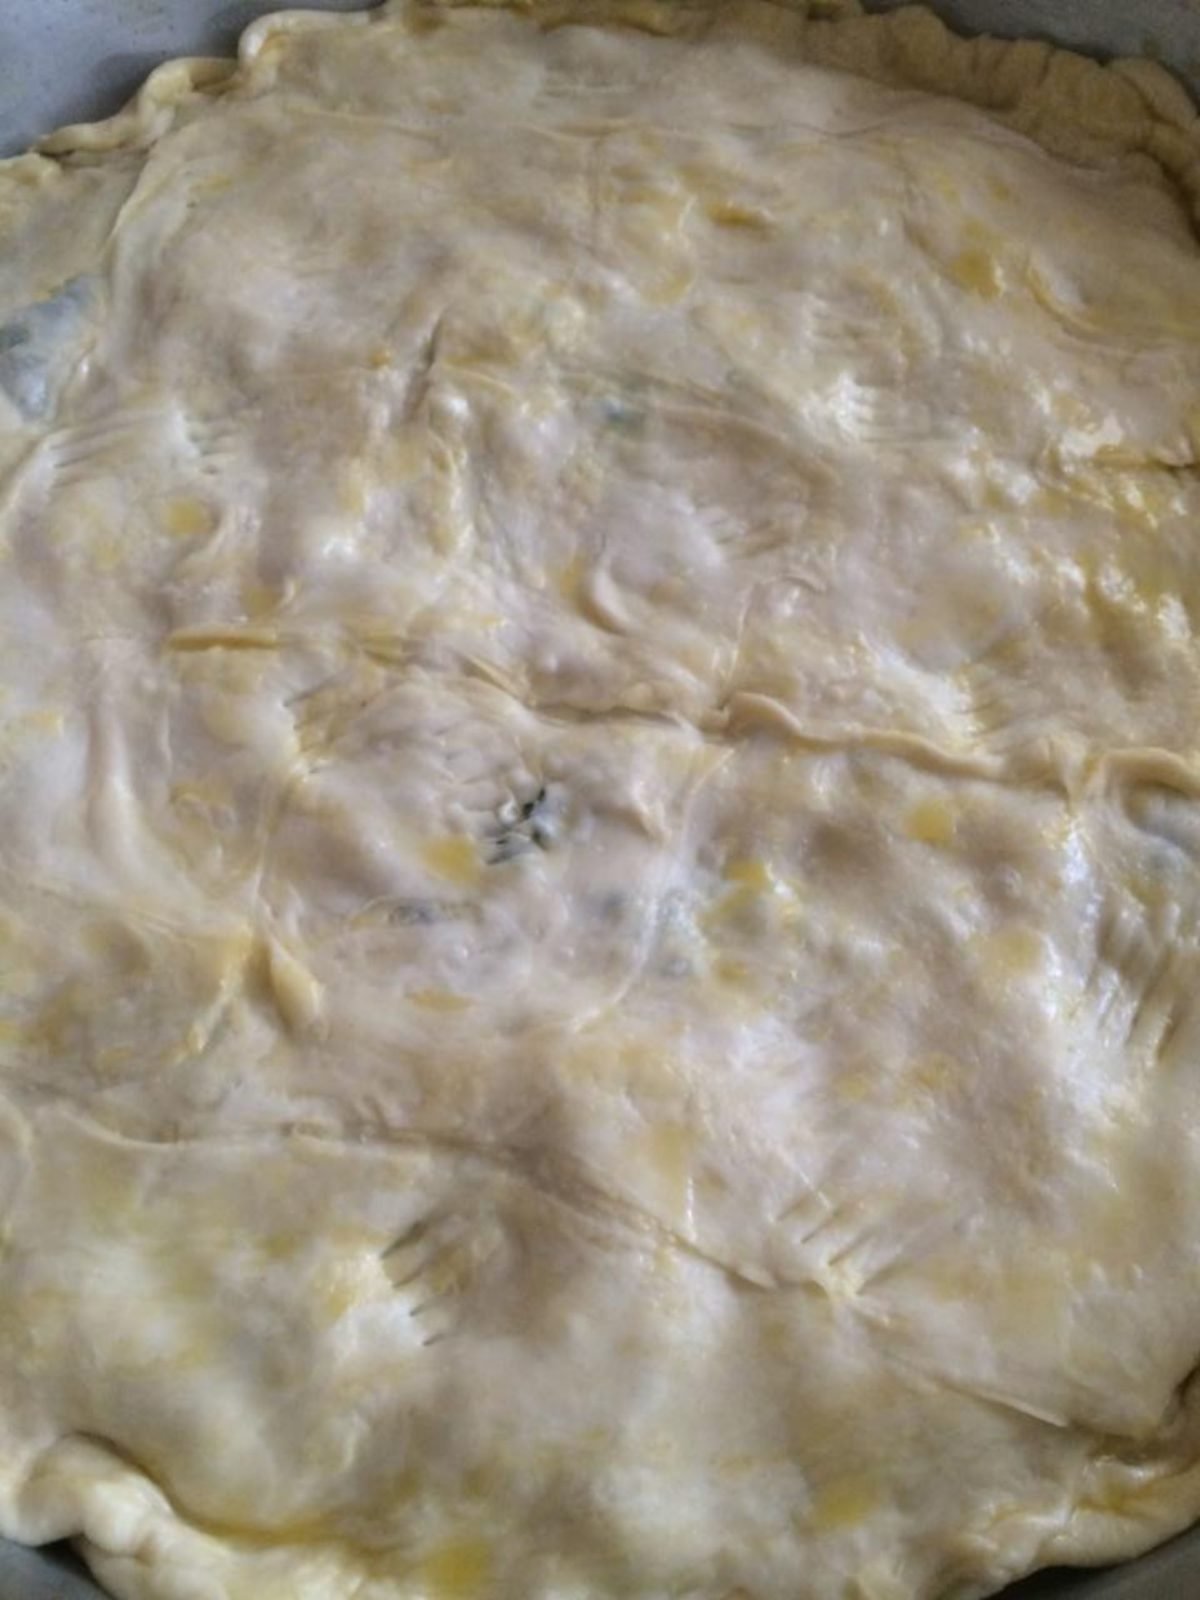
2. Add your top later and pinch together with the overlapping of the bottom layer, pressing it up against the edges of your tray with a fork.
3. With the fork poke some holes through the top of the filo/ pita and coat generously with the rest of your clarified butter.
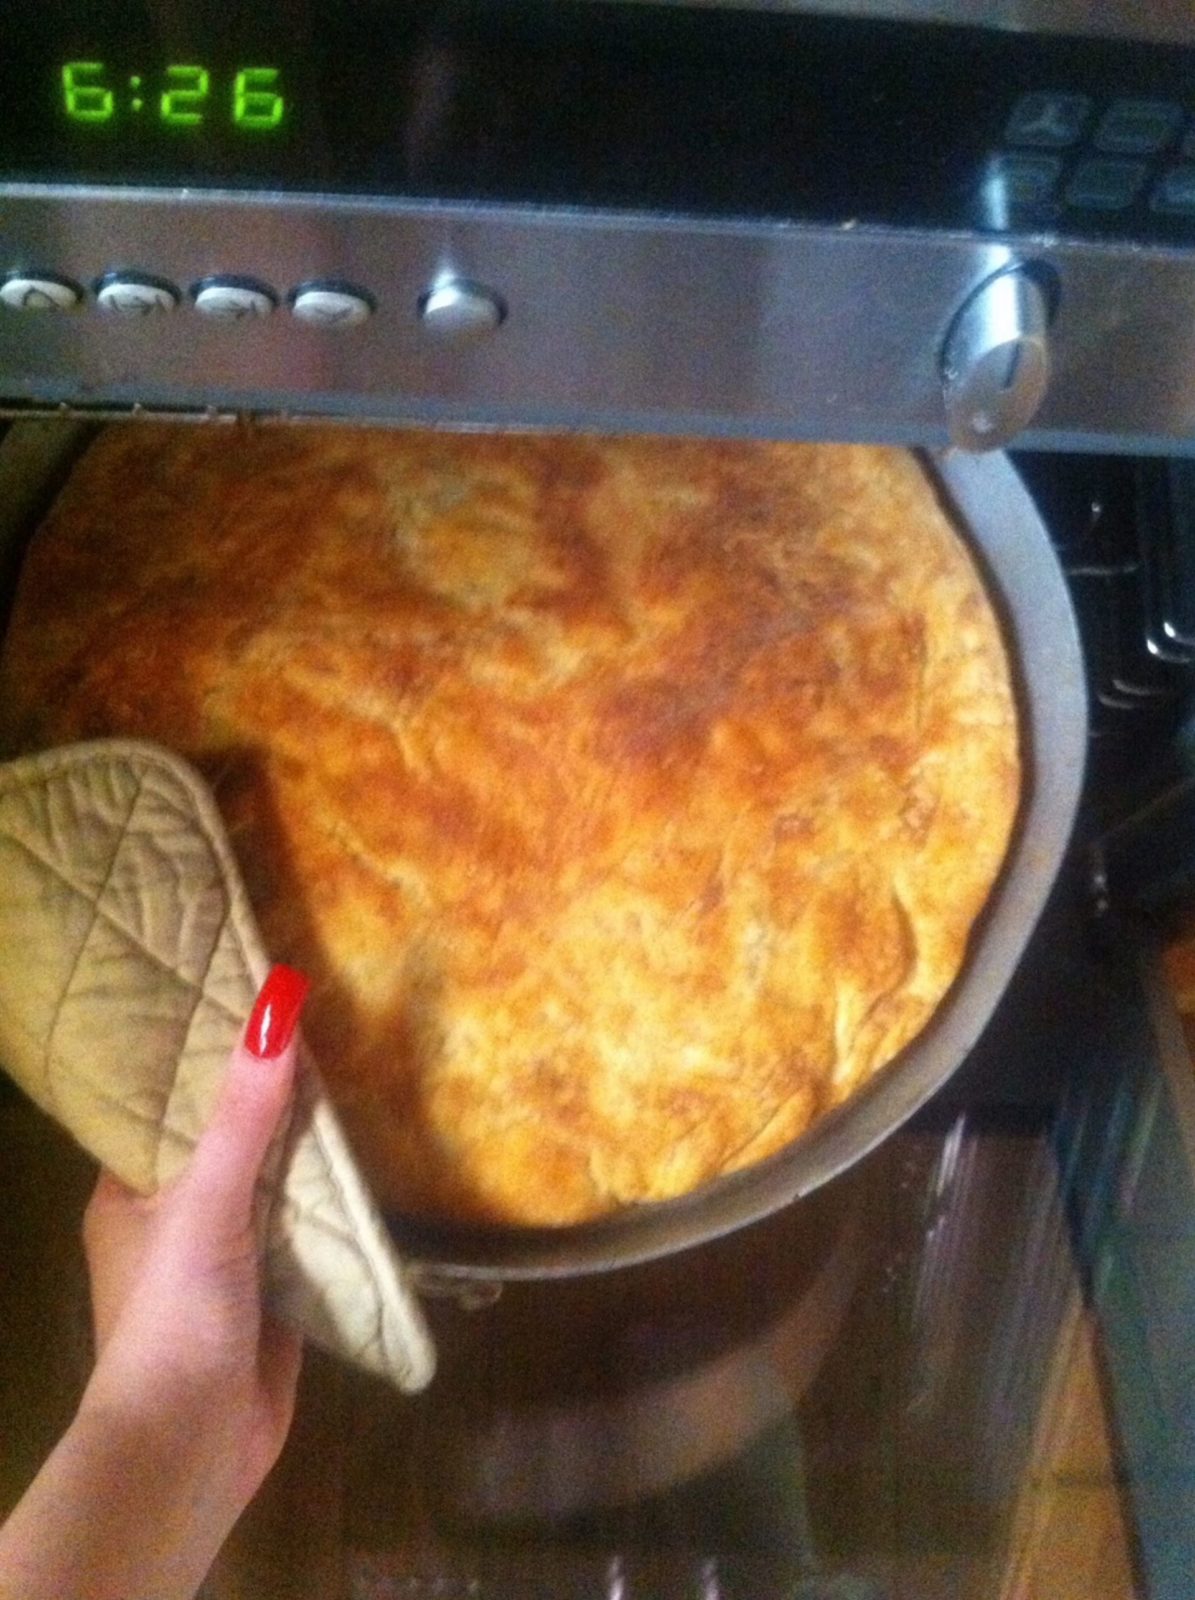
4. Preheat your oven between 180-200°C and bake for around 25 minutes or until golden brown.
Top tip: To save time, pre-make your pita and then cling wrap the entire tray and freeze. I usually add a post-it note on top, underneath the last layer of cling wrap labelling what sort of pita filling it is.
Kali Orexi!
* If you would like to share a cherished recipe that has been passed down to you from your grandmother, or another special person in your life, email anastasia@neoskosmos.com.au